
Step 1 — Connect a Git provider
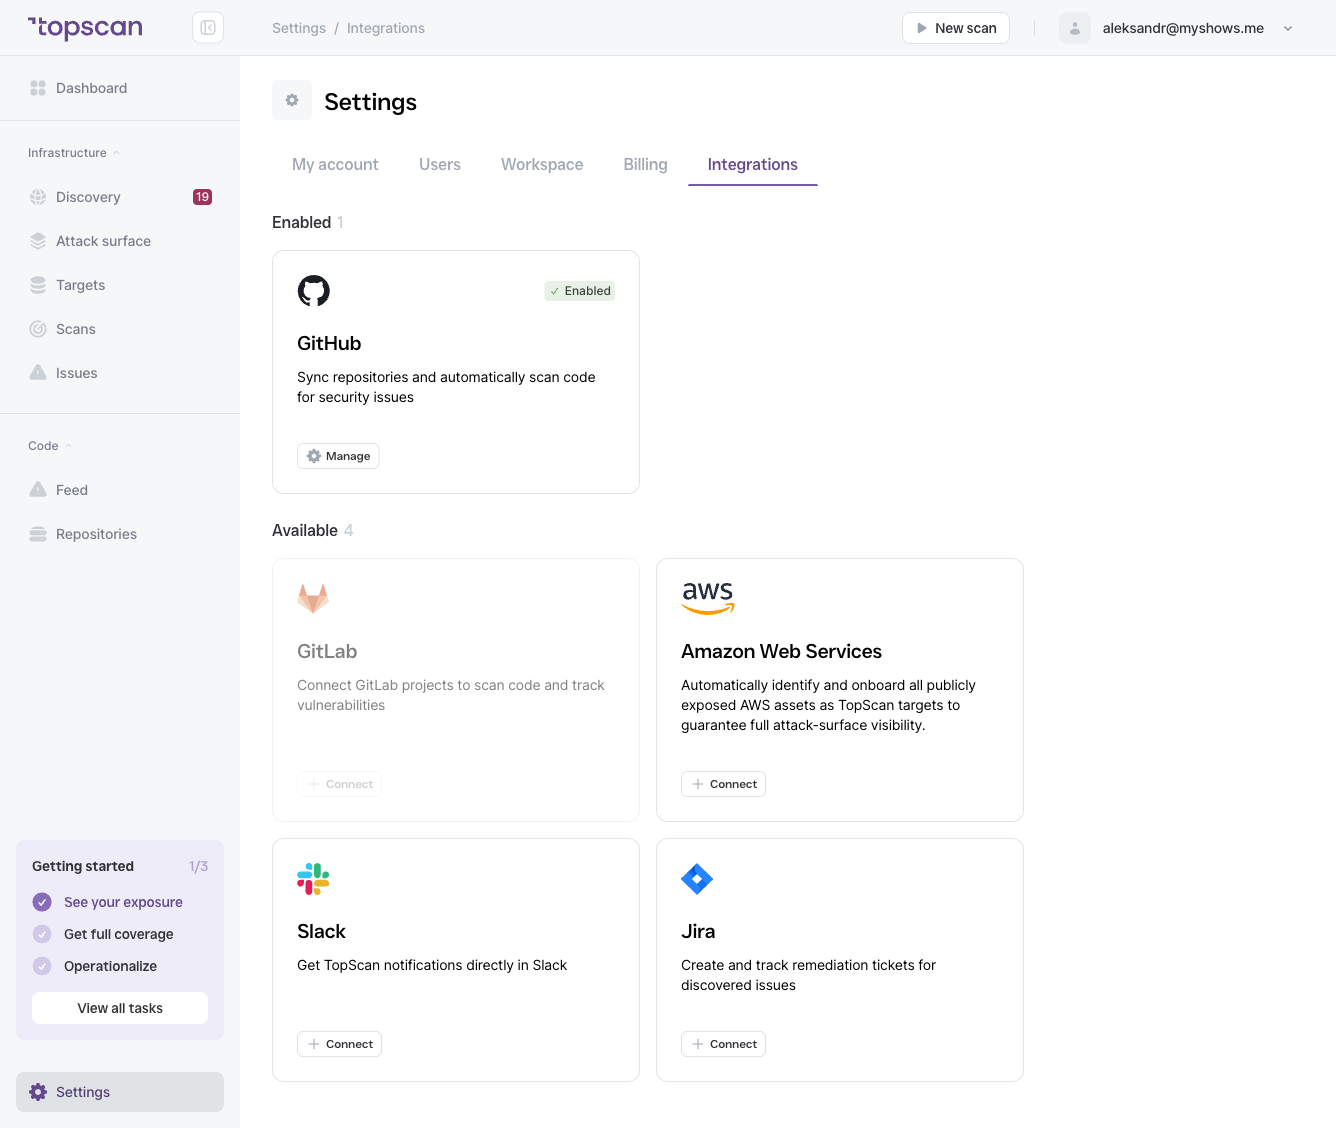
- Go to Settings → Integrations.
- Find your Git provider (GitHub or GitLab) and click Connect.
- Follow the OAuth authorization flow to grant Topscan read access to your repositories.
Topscan only needs read access to your code. It does not write to your repositories.
Step 2 — Select repositories
- Go to Repositories in the left navigation.
- Click Manage Repos.
- Select the repositories you want to monitor from the list of repositories available in your connected Git provider.
- Save.
Selected repositories appear in the Repositories list and will be scanned automatically.
What gets scanned
For each connected repository, Topscan scans the default branch (shown in the Branch column). The scan analyzes:
- Source code for insecure patterns
- Configuration files and infrastructure-as-code
- Package dependency files (e.g.
package.json,go.mod,requirements.txt) for known vulnerable packages - All files for hard-coded secrets and credentials
The Repositories list
After connecting, the Repositories page shows each monitored repo with:
| Column | What it shows |
|---|---|
| Name | Repository path (e.g. org/repo-name) |
| Branch | The branch being scanned |
| Language | Primary languages detected |
| Issues | Open SAST findings by severity |
| Last scan | When the most recent SAST scan completed |